
Painting a kitchen sink can be a cost-effective and creative way to give your kitchen a new look. While it is possible to paint a kitchen sink, there are essential considerations to remember. Understanding the sink’s material is crucial in determining whether it can be successfully painted. The three standard kitchen sinks include porcelain, stainless steel, and acrylic sinks, each with its characteristics and requirements for painting.
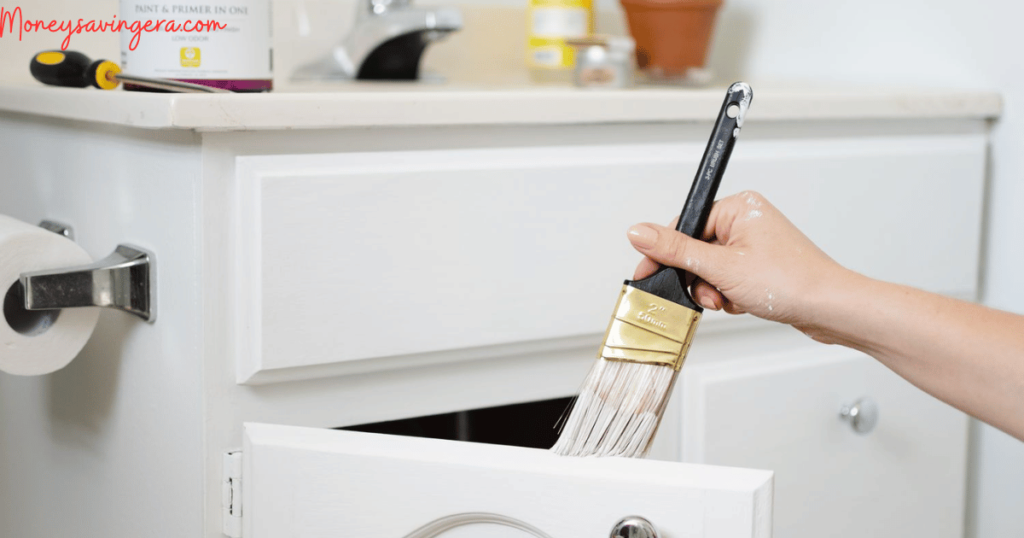
Before embarking on the painting process, proper preparation is essential. This includes cleaning the sink thoroughly to remove dirt or grease, sanding the surface to create a rough texture for better adhesion, and masking off the surrounding areas to protect them from paint splatter.
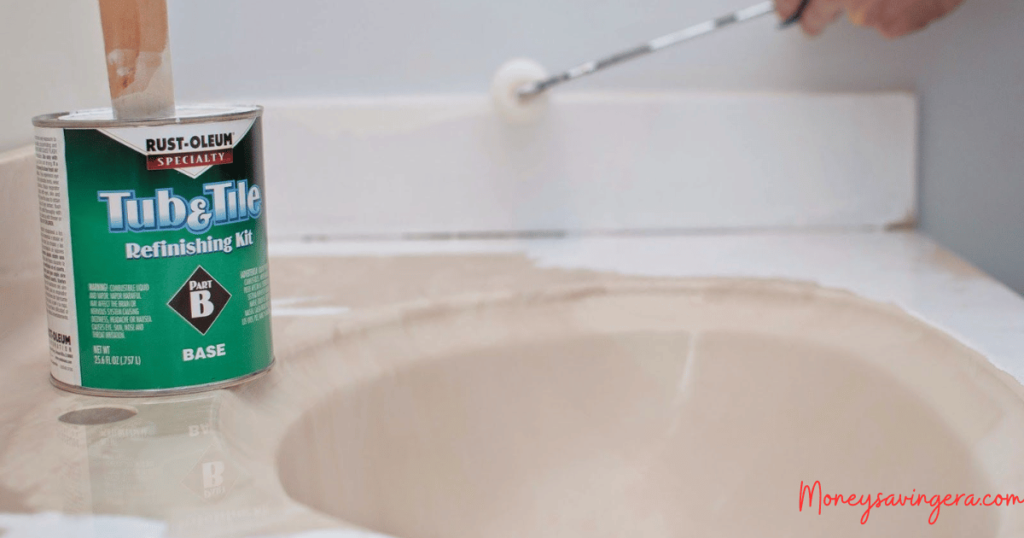
Choosing the right paint for the kitchen sink is crucial to ensure long-lasting results. Options like epoxy paint, acrylic enamel paint, or specialty sink paint can provide durability and resistance to water and chemicals.
The actual steps to paint the kitchen sink involve applying a primer to promote paint adhesion, followed by applying the paint in multiple thin coats for an even finish. Once the paint has dried, applying a sealant will help protect the painted surface from daily wear and tear.
However, painting a kitchen sink may come with potential problems and limitations. Durability may be compromised, especially in high-use areas, and regular maintenance will be required to preserve the painted surface. The color options for painted sinks may be limited compared to purchasing a new sink.
By understanding the process and considering these factors, you can decide if painting your kitchen sink is the right choice and achieve a refreshed look for your kitchen with this DIY approach.
Key Takeaway:
- Understanding the material of the kitchen sink is essential before painting it, as different types require different paint options: porcelain, stainless steel, and acrylic sinks are the most common.
- Preparing the sink for painting involves thorough cleaning, sanding, and masking off the surrounding areas to ensure a smooth and even finish.
- Choosing the right paint for the kitchen sink is crucial for long-lasting results: epoxy paint, acrylic enamel paint, and specialty sink paint.
Can You Paint a Kitchen Sink?
Can you paint a kitchen sink? You can paint a kitchen sink, but it is important to consider some factors.
Firstly, it is crucial to note that not all sinks are suitable for painting. Most traditional porcelain or ceramic sinks have a smooth, glazed surface that paint struggles to adhere to. However, if you have a sink made of stainless steel or cast iron, painting is a possibility.
Before painting, you must ensure the sink is adequately cleaned and prepared. Using a mild detergent, clean the sink thoroughly to remove any dirt or grease. Next, sand the sink’s surface to create a rough texture to help the paint stick. Use fine-grit sandpaper to avoid causing scratches or damage to the sink.

Once the sink is clean and sanded, you can apply a primer specifically designed for metal surfaces. This primer will provide a good base for the paint and help it adhere better. Be sure to follow the manufacturer’s instructions on how to apply the primer.
After the primer has dried, you can paint the sink. Choosing a paint suitable for metal surfaces and designed to withstand water and high temperatures is important. Apply thin, even coats of paint, allowing each coat to dry completely before applying the next.
Keep in mind that painted sinks may require additional maintenance and care. Avoid using abrasive cleaners or scrub brushes that could damage the painted surface. Instead, clean the sink with a mild detergent and a soft cloth or sponge.
Over time, it is possible for the paint on a kitchen sink to chip or fade. To maintain its appearance, you may need to touch up the paint or consider repainting the sink periodically.
Understanding the Material of the Kitchen Sink
When it comes to understanding the material of a kitchen sink, there are quite a few options to consider. Each material offers unique advantages from the classic porcelain sink to the sleek stainless steel and the versatile acrylic sink. In this section, we’ll dive into the characteristics and benefits of each type, giving you a clearer picture of what to look for when selecting the perfect kitchen sink for your culinary haven.
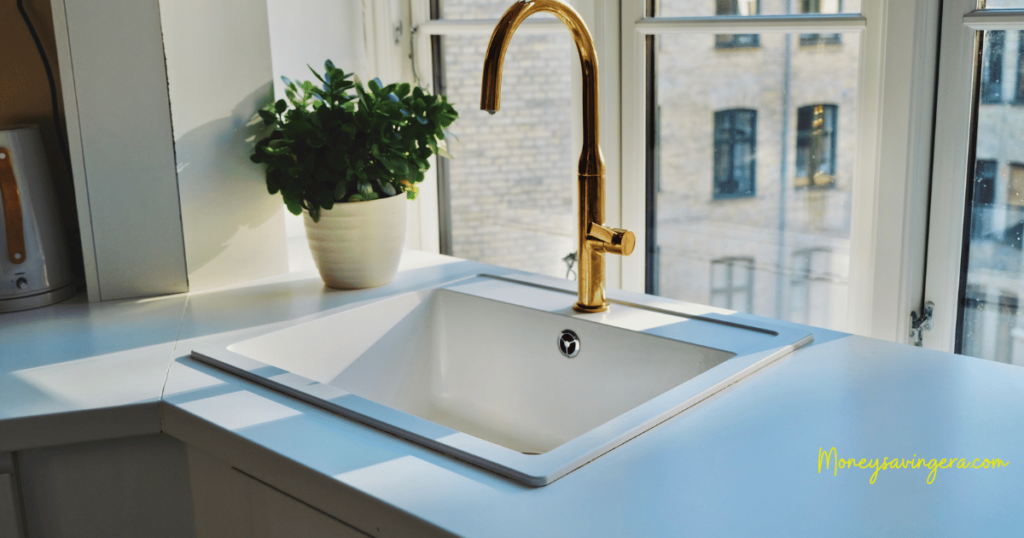
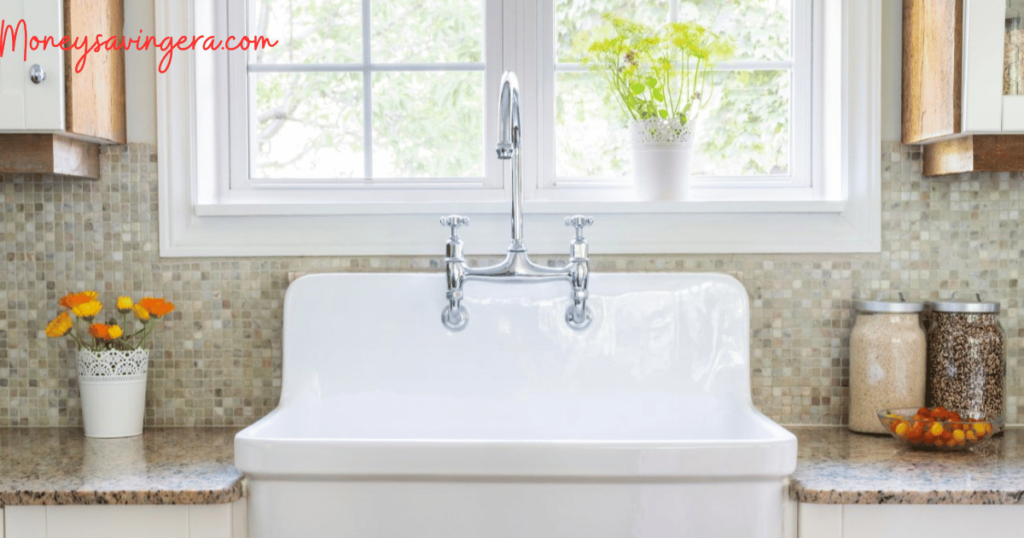
Porcelain Sink
A porcelain sink, also known as a porcelain sink, is a popular choice for many kitchens due to its durability and timeless aesthetic. It is important to properly care for and maintain a porcelain sink to ensure its longevity. Here are some key points to consider when dealing with a porcelain sink:
| Porcelain Sink |
| When using a porcelain sink, it is important to take precautions to prevent damage. Placing hot pots or pans directly on the sink’s surface should be avoided, as extreme heat can cause cracking. Using a trivet or heat-resistant pad to protect the sink is advisable. |
| Porcelain sinks are highly durable and suitable for everyday use as they resist stains and scratches. However, avoiding using abrasive cleaners or scrub pads on the surface is important, as this can cause damage. |
| When using a porcelain sink, it is important to take precautions to prevent damage. Placing hot pots or pans directly on the sink’s surface should be avoided, as extreme heat can cause cracking. It is advisable to use a trivet or heat-resistant pad to protect the sink. |
| Using a soft cloth or sponge and a mild cleaning solution is best when cleaning a porcelain sink. Harsh chemicals or abrasive cleaners should be avoided as they can damage the surface. Regular cleaning will help maintain the sink’s appearance and prevent the buildup of dirt and grime. |
| Porcelain sinks can be a beautiful addition to any kitchen, offering functionality and aesthetics. By practicing proper care and regular cleaning, a porcelain sink can maintain its beauty and functionality for many years to come. |
| Porcelain sinks can be a beautiful addition to any kitchen, offering functionality and aesthetics. By practicing proper care and regular cleaning, a porcelain sink can maintain its beauty and functionality for many years. |

Porcelain sinks, or porcelain sinks, are a practical and elegant choice for any kitchen. By following these tips and maintaining your porcelain sink properly, you can enjoy its durability and beauty for a long time.
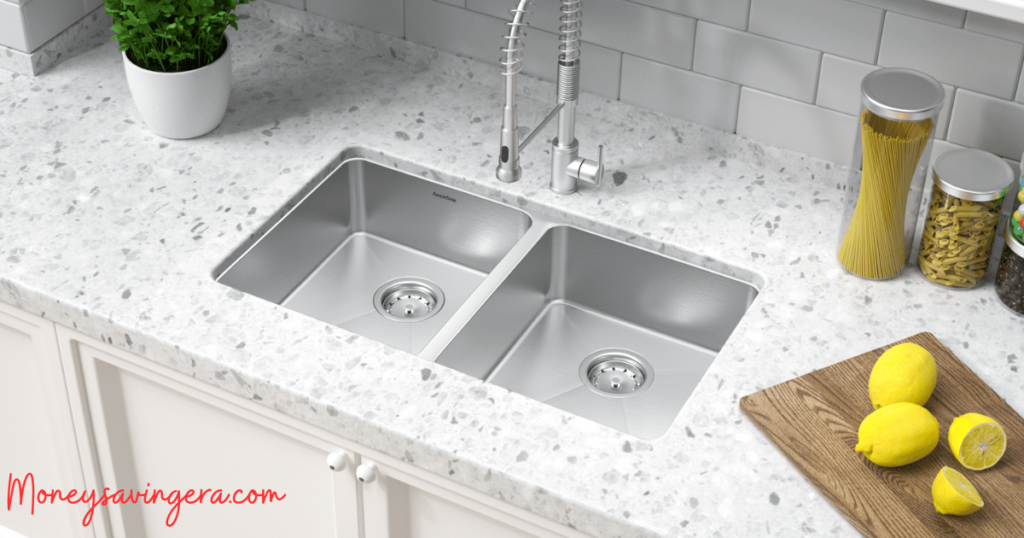
Stainless Steel Sink
Several important factors must be considered when choosing a stainless steel sink for your kitchen. The table below provides a breakdown of the key aspects to keep in mind:
| Aspect | Description |
| Material | Stainless steel sinks are made from a combination of iron and chromium. They are durable, resistant to corrosion, and easy to clean. |
| Size | Stainless steel sinks come in various sizes, ranging from small single-bowl options to large double-bowl configurations. Consider the available space in your kitchen and your specific needs. |
| Depth | The depth of the stainless steel sink determines its capacity and functionality. Deeper sinks are great for washing large pots and pans, while shallower ones are more suitable for general everyday use. |
| Gauge | The gauge of the stainless steel sink refers to its thickness. A lower gauge number indicates a thicker and more durable sink. |
| Noise Reduction | Some stainless steel sinks come with noise reduction features, such as padding or a coating, to minimize the sound of water and dishes hitting the surface. |
| Finish | The depth of the stainless steel sink determines its capacity and functionality. Deeper sinks are great for washing large pots and pans, while shallower ones are more suitable for everyday use. |
When selecting a stainless steel sink, it is important to consider the quality, functionality, and aesthetics. Look for reputable brands that offer a range of options to suit your needs. Further, ensure the stainless steel sink is compatible with your existing plumbing setup and adheres to local regulations.
In terms of maintenance, stainless steel sinks are relatively easy to clean. Use a mild dish soap and a soft cloth or sponge to remove dirt or stains. Avoid abrasive cleaners or scrubbing pads that can scratch the surface. You can use a stainless steel cleaner or polish to restore the shine.
A stainless steel sink can be an excellent choice to update your kitchen. Consider the above factors and select a stainless steel sink that fits your needs and design preferences. With proper care and maintenance, a high-quality stainless steel sink can last for many years and continue to enhance the functionality and appearance of your kitchen.
Acrylic Sink
When it comes to painting an acrylic sink, there are some important considerations to keep in mind. Here is a list of factors to consider:
- Surface preparation: Preparing the surface properly before painting the acrylic sink is crucial. This involves thoroughly cleaning the sink with dish soap and warm water to remove dirt, grease, or sticky leftovers.
- Scratching the surface: To promote paint adhesion, use a scrub pad or 150-grit sandpaper to lightly scratch the surface of the acrylic sink. This will create a textured surface for the paint to adhere to.
- Choosing the right paint: Selecting the appropriate type of paint is vital for a successful painting project. Acrylic enamel paint is recommended for an acrylic sink as it provides a durable and waterproof coating. Make sure to choose a paint specifically designed for use on acrylic surfaces.
- Applying the paint: Use a foam roller for an even paint application. Apply thin coats of paint, allowing each coat to dry completely before applying the next one. This will help prevent drips and ensure a smooth finish.
- Finishing touches: Once the paint has dried, apply an acrylic sealer to protect the paint and make it more resistant to water and other liquids. This will help maintain the longevity of the painted surface.
When considering painting an acrylic sink, it’s important to note that there are some limitations and potential problems to be aware of:


- Durability: While acrylic enamel paint provides a durable coating, it may not be as resistant to scratches and chips as the original surface of the sink. Avoid using abrasive cleaning products or tools that could damage the painted surface.
- Maintenance: Proper maintenance is essential to ensure the longevity of the painted acrylic sink. Avoid using harsh chemicals or abrasive scrubbers that could wear away the paint. Instead, use mild dish soap and a soft cloth to clean the sink.
- Color options: When painting an acrylic sink, remember that the color options may be limited compared to other types of sinks. However, with careful selection and creativity, you can still achieve a fresh look for your sink.
Preparing the Sink for Painting
Preparing the sink for painting is crucial in giving your kitchen a fresh look. This section will explore the necessary tasks to prepare your sink for a flawless paint job. We’ll cover all the essential steps, from thoroughly cleaning the surface to sanding imperfections.
Also, we’ll discuss the importance of masking off the surrounding areas to protect them from accidental paint splatters. Following these guidelines, you’ll be well-prepared to transform your kitchen sink into a stunning focal point.
Cleaning the Sink
When cleaning the sink, following the proper steps to ensure a clean and sanitary surface is important. Here is a list of steps to effectively clean the sink:
- Gather the necessary supplies for cleaning the sink. You will need dish soap, a scrub pad or sponge, a cotton rag, and a cleaning solution suitable for your sink material.
- Remove any debris or excess dirt from the sink. When cleaning the sink, use a paper towel or rag to wipe away any loose particles.
- Apply dish soap to the scrub pad or sponge when cleaning the sink. Scrub the entire sink surface, focusing on areas with stains or stuck-on food particles.
- Rinse the sink thoroughly with water when cleaning the sink, removing all traces of soap.
- If necessary, use a cleaning solution specifically designed for your sink material when cleaning the sink. Follow the instructions on the product for proper application and usage.
- When cleaning the sink, you may need a rust converter or a mild abrasive cleaner for stubborn stains or rust spots. Be sure to test these products in a small, inconspicuous area of the sink first to ensure they do not damage the surface.
- Once the sink is clean, dry it thoroughly with a cotton rag or towel to prevent water spots or streaks.
- When cleaning the sink, you can apply a stainless steel polish or a sink-specific sealer for a shiny finish. Follow the instructions on the product for proper application.
- After cleaning, remember to also clean the surrounding areas when cleaning the sink, such as the faucet, handles, and drain. Use a disinfectant cleaner or a mixture of vinegar and water to remove bacteria or germs.
By following these steps for cleaning the sink, you can ensure that your sink is clean and free from dirt, stains, and bacteria. Regular cleaning will help maintain the appearance and functionality of your sink, keeping it looking fresh and inviting.
Sanding the Sink
To properly prepare the sink for painting, it is crucial to incorporate the sanding process. You can create a smooth surface and ensure better paint adhesion by sanding the sink. Follow these steps:
- Gather the necessary materials: safety gloves, 220-grit sandpaper, a scrub pad, and a cotton rag.
- For protection during the sanding process, put on the safety gloves.
- Moisten the sink surface with water.
- Fold the 220 grit sandpaper into a small square or pad.
- Apply gentle pressure while sanding the sink surface in circular motions, covering the entire surface area.
- Continue sanding until the sink’s shiny finish is removed and the surface becomes dull and rough.
- After sanding, thoroughly rinse the sink to eliminate any sanding dust and debris.
- To remove any sticky residue or dirt, use a scrub pad with dish soap to clean the sink surface.
- Rinse the sink again to ensure a clean and residue-free surface.
- Once the sink is clean and dry, use a cotton rag to wipe away any remaining moisture.
By diligently following these steps, you can effectively sand the sink surface and prepare it for painting. Remember to be meticulous in your sanding process to achieve optimal results with your paint application.
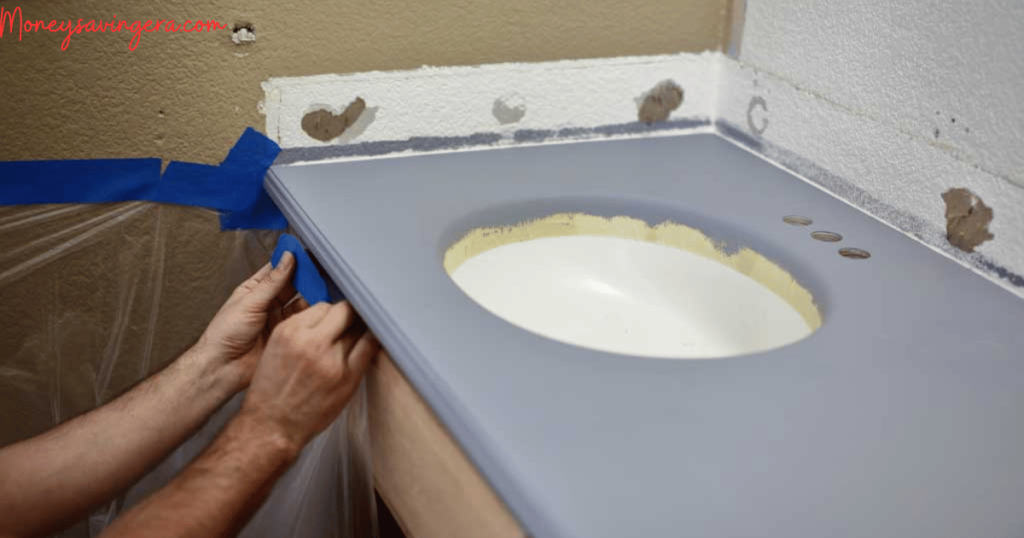
Masking Off the Surrounding Areas
When painting a kitchen sink, it’s crucial to properly mask off the surrounding areas to protect them from paint and ensure a clean and professional-looking finish. Here are the steps to effectively mask off the surrounding areas:
- Clean the sink: Before starting the masking process, make sure the sink is clean and free from dirt or residue. Use dish soap and a scrub pad to remove any stuck-on food particles.
- Remove drains and water lines: Remove the drain and water lines from the sink to make the masking process easier. Loosen the nut and carefully disconnect the lines. Set them aside in a safe place.
- Prepare the surface: Use 150-grit sandpaper to lightly sand the sink’s surface. This will help the paint adhere better. Wipe away any dust particles with a damp cloth.
- Apply painter’s tape: Use painter’s tape to mask off the area around the sink, effectively masking off the surrounding areas. Carefully apply the tape along the edges of the sink, ensuring that it covers the surrounding countertop and any other areas you want to protect from paint.
- Cover nearby surfaces: Use floor covers or old sheets to protect the surrounding floor or cabinets from any paint drips or splatters. Make sure these covers are securely in place.
- Mask off the faucet: If you have a slide water faucet, use painter’s tape to mask off the areas around it. This will ensure that no paint gets on the faucet during the painting process.
- Protect the walls: If the sink is against a wall, use painter’s tape to mask off the wall surrounding the sink, effectively masking off the surrounding areas. This will prevent any accidental paint splatters from reaching the wall.
Following these steps and adequately masking off the surrounding areas, you can ensure a neat and professional paint job on your kitchen sink. Always wear safety gloves and follow local regulations or guidelines when undertaking a DIY painting project.
Choosing the Right Paint for the Kitchen Sink
When transforming your kitchen sink, the right choice of paint makes all the difference. In this section, we’ll dive into the various options for giving your sink a fresh look. We’ll explore the benefits and unique characteristics of epoxy paint, acrylic enamel paint, and specialty sink paint. Get ready to discover the perfect paint solution to revitalize your kitchen sink and make it a focal point of your culinary haven.
Epoxy Paint
Epoxy paint is a popular choice for kitchen sinks due to its durable and water-resistant properties. Here are some important details to consider when using epoxy paint to refinish your kitchen sink:
- Surface preparation: Preparing the surface properly before applying epoxy paint is crucial. Clean the sink thoroughly using dish soap to remove dirt, grease, or sticky leftovers. Use a scrub pad or sponge to ensure the surface is clean and debris-free. Rinse the sink well and allow it to dry completely.
- Repair damaged areas: If there are any chips or cracks in the sink, it’s important to repair them before painting. Use a suitable product like a rust converter or epoxy filler to fix these areas. Sand the repaired areas with 220-grit sandpaper to ensure a smooth surface.
- Mask off surrounding areas: To protect the countertop or any other nearby surfaces from accidental paint splatters, use painter’s tape to mask them off. Cover the faucet, drains, and water lines with plastic or tape to prevent paint from getting on them.
- Apply a bonding primer: Use a high-quality bonding primer specifically designed for the surface material of your sink. Apply the primer evenly using a brush or paint sprayer. Follow the manufacturer’s instructions for drying time.
- Apply epoxy paint: Once the primer is completely dry, it’s time to apply it. Stir the paint thoroughly before application. Using a foam roller or paint sprayer, apply thin coats of the epoxy paint to ensure even coverage. Allow each coat to dry before applying the next coat. Two to three coats are usually recommended for a durable coating.
- Apply a waterproof sealer: After the final coat of epoxy paint has dried, consider applying a waterproof sealer for added protection. This will enhance the longevity of the paint and provide extra resistance against water and stains.
- Final touches: Once the sink has been painted and sealed, remove the painter’s tape and any protective covers. Clean the sink again to remove any dust particles or debris that may have settled on the surface during the painting process. Use a cotton rag and water to wipe down the sink and ensure it is ready for use.
When using epoxy paint, it is important to follow all safety precautions and guidelines provided by the manufacturer. Ensure the area is well-ventilated, and wear safety gloves to protect your hands. Also, check your local regulations regarding the proper disposal of paint-related materials.

Applying epoxy paint to your kitchen sink gives it a fresh new look without the expense of purchasing a brand-new sink. With proper maintenance and care, a painted sink can provide years of enjoyment and functionality in your kitchen.
Acrylic Enamel Paint
Acrylic enamel paint is a popular choice for kitchen sinks due to its durability, versatility, and easy application process. Here are some important things to consider when using acrylic enamel paint for your kitchen sink:
- Surface preparation: Properly preparing the sink’s surface is crucial before applying acrylic enamel paint. This includes cleaning the sink thoroughly with dish soap to remove grease, grime, or stuck-on food particles. Use a scrub pad to scrub away any tough stains or residue. Rinse the sink well and dry it thoroughly with a cotton rag.
- Priming: A bonding primer for kitchen sinks is recommended to ensure proper adhesion and a smooth finish. This will help the paint adhere to the surface and provide a durable coating. Use a paintbrush or a foam roller to apply the primer evenly on the sink.
- Paint application: Once the primer is dry, it’s time to apply the acrylic enamel paint. Choose a color that complements your kitchen decor. Apply thin coats of paint using a paintbrush or sprayer, allowing each coat to dry completely before applying the next. This will help prevent drips and ensure an even finish.
- Sealing: A waterproof sealer specifically designed with acrylic enamel paint is recommended to protect the painted surface and increase its longevity. This will provide extra protection against water damage, stains, and scratches.

When using acrylic enamel paint on your kitchen sink, keep in mind these special considerations:
- Follow all local regulations and safety guidelines when handling paint and other chemicals.
- Remove any drains or hardware from the sink before painting to ensure a smooth and even application.
- For best results, lightly sand the sink’s surface with 150-grit sandpaper before priming to promote adhesion.
- Consider using painter’s tape to mask off any surrounding areas you don’t want to paint.
- Allow the painted sink to cure completely before exposing it to water or heavy use. This will ensure that the paint fully hardens and provides a durable finish.
Did you know that the invention of acrylic paint revolutionized the art world? In the mid-20th century, artists sought an alternative to oil paint that offered similar qualities without a lengthy drying time and pungent odor. Acrylic paint quickly became a favorite among artists became a favorite among artists with its fast-drying nature and versatility. Its water-based composition allows for easy clean-up and the ability to be used on various surfaces, including canvas, wood, and even kitchen sinks. Today, acrylic paint is widely used by artists and DIY enthusiasts, offering a wide range of vibrant colors and providing endless creative possibilities.
Specialty Sink Paint
Specialty sink paint can be a great option when painting a kitchen sink. Here are some essential factors to consider:
- Choose the correct type of paint: Specialty sink paint is specifically formulated for use on sinks. It is designed to withstand water exposure, resist chips and scratches, and provide a durable and long-lasting finish. Look for paints that are explicitly labeled for use on sinks.
- Prepare the surface: Proper surface preparation is crucial for a successful paint job. Clean the sink thoroughly to remove any dirt, grease, or residue. Use a scrub pad and dish soap to remove any stuck-on food particles. Rinse the sink well and dry it thoroughly before starting the painting process.
- Apply primer: AAbonding primer designed for ink surfaces is essential. The primer helps the paint adhere to the sink and provides a smooth and even base. Apply a thin coat of primer using a foam roller or brush, and allow it to dry completely according to the manufacturer’s instructions.
- Apply paint: Once the primer is dry, apply the specialty sink paint. Follow the manufacturer’s instructions for application techniques and drying times. Applying multiple thin coats rather than one thick coat is important to ensure an even and long-lasting finish.
- Apply sealant: To protect the painted surface and enhance its durability, consider applying a waterproof sealer specifically designed for use on sink surfaces. This will help to prevent water damage and ensure the paint coating lasts for a long time.
When using specialty sink paint, be aware of some special considerations. Following all safety precautions and using appropriate protective gear, such as safety gloves. Also, check the local regulations regarding the paints that can be used in your area. Finally, remember that the durability of the painted sink will depend on how well it is maintained. Avoid using abrasive cleaners or scrub pads that could damage the paint, and be mindful of any excessive force that could chip or scratch the surface.

Specialty sink paint can be a cost-effective way to spruce up an old kitchen sink or give it a fresh look. However, it’s important to note that painting a sink is a DIY project that requires careful preparation and attention to detail. If you’re unsure about your painting skills or want a professional finish, it’s best to consider having the sink refinished professionally.
Steps to Paint a Kitchen Sink
If you’re looking to give your kitchen sink a fresh new look, you’re in the right place. This guide will walk you through the step-by-step process of painting your kitchen sink. From applying the primer to adding the final sealant, we’ll cover everything you need to know to transform your sink into a stunning focal point for your kitchen. So, grab your brushes, and let’s get started on this exciting DIY project!
Applying Primer
Applying primer is a crucial step in painting a kitchen sink as it helps to create a smooth and durable surface for the paint to adhere to. Here are the steps to follow when applying primer:
- Clean the surface: Before applying primer, make sure the sink is clean and free of any dirt, grease, or debris. Use a mild dish soap and a scrub pad to remove any stuck-on food particles or residue.
- Sand the sink: Use 150-grit sandpaper to roughen the sink’s surface gently. This will help the primer adhere better. Be sure to sand all sink areas, including the edges and corners.
- Mask off surrounding areas: Use painter’s tape to cover areas around the sink you don’t want to get a primer on, such as the countertop or backsplash. This will protect these areas from accidental paint application.
- Apply primer: Using a paint sprayer or a foam roller, apply a thin and even coat of bonding primer to the entire surface of the sink. Be sure to cover all areas, including the inside and outside of the sink and the edges. Let the primer dry according to the manufacturer’s instructions.
- Sand the primer: After drying, lightly sand the entire sink surface using 220-grit sandpaper. This will help smooth out any imperfections and create a better feeling for the paint.
- Apply a second coat of primer: If necessary, apply a second coat of primer to ensure complete coverage and an even finish. Allow the second coat to dry completely.
- Clean up: Once the primer is dry, remove the painter’s tape and any excess primer or dust particles from the surrounding areas.
Following these steps, you can ensure that the primer is applied properly and the sink’s surface is ready for the next step: applying the paint. Make sure to choose a paint specifically designed for kitchen sinks and follow the instructions on the paint can for the best results.
Applying primer is an essential part of the process, as it helps the paint adhere better and creates a smooth and durable coating that will last for a long time. Take your time and ensure that each step is done correctly to achieve a professional-looking finish.
Applying Paint
When applying paint to a kitchen sink, there are several steps to ensure a successful and long-lasting finish. Here is a list of steps to guide you through the process:
- Prepare the surface: Before applying paint, make sure the sink surface is clean and free of any dirt, grease, or stuck-on food particles. Use a scrub pad and dish soap to clean the sink thoroughly.
- Remove drains and water lines: To have full access to the sink surface, remove the drains and water lines. Use a wrench to loosen the drain nut and carefully remove it.
- Sand the sink: Use 150-grit sandpaper to lightly sand the surface. This will create a rough texture that helps the paint adhere better. Wipe away any dust particles with a clean cloth.
- Apply primer: Using a paint sprayer or a foam roller, apply a thin coat of bonding primer to the entire sink surface. This will create a smooth and even base for the paint to adhere to.
- Apply paint: Once the primer is dry, you can start applying the paint. Choose a paint specifically designed for kitchen sinks, such as water-resistant enamel or two-part epoxy paint. Apply thin coats of paint, allowing each coat to dry before applying the next. This will prevent drips or uneven coverage.
- Apply sealant: After the final coat of paint has dried, apply a waterproof sealer to protect the paint finish and provide added durability. Follow the manufacturer’s instructions for application and drying times.
- Reinstall drains and water lines: Once the sealant is dry, you can reinstall the drains and water lines. Make sure everything is securely tightened.
These steps will help you achieve a smooth and durable coating on your kitchen sink. It’s important to note that proper surface preparation and paint selection are crucial for a successful outcome. If you are unsure or uncomfortable with the DIY process, it’s always recommended to consult a professional for refinishing a kitchen sink.
Always follow local regulations and safety guidelines when working with paints and chemicals. Wear safety gloves and use proper ventilation during the painting process. With a fresh coat of paint, you can give your old kitchen sink a new and refreshed look, adding style to your kitchen.
So, transform your kitchen sink with a coat of paint. Enjoy the process and the result of your DIY project!
Applying Sealant
When applying sealant to a painted kitchen sink, it is important to follow the proper steps to ensure a durable and long-lasting finish. Here is a list of steps to effectively apply sealant to a painted kitchen sink:
- Clean the sink surface thoroughly using dish soap and a scrub pad. Remove any dirt, grime, or sticky leftovers.
- Use a cotton rag to dry the sink completely before applying the sealant.
- Apply painter’s tape to mask off the surrounding areas of the sink that you want to protect from the sealant.
- Prepare the surface by lightly sanding it with 150-grit sandpaper. This will help the sealant adhere better to the painted surface.
- Wipe away any dust particles with a clean, damp cloth before proceeding.
- Using a foam roller, apply a thin and even coat of sealant to the entire painted sink surface.
- Allow the first coat of sealant to dry completely according to the manufacturer’s instructions.
- If necessary, apply a second coat of sealant for added durability and protection. Allow it to dry completely as well.
- Once the sealant is dry, carefully remove the painter’s tape to reveal clean edges and lines.
- Inspect the sealed sink for any imperfections or missed spots. Touch up as needed.
These steps will help ensure a waterproof and durable coating on your painted kitchen sink. The sealant will help protect the paint from water damage and daily wear and tear.
Potential Problems and Limitations
When painting your kitchen sink, it’s important to be aware of the potential problems and limitations you might encounter. Each sub-section offers a unique perspective on your challenges, from durability concerns to maintenance requirements and limited color options.
So before you dive into this DIY project, let’s explore the facts, figures, and expert insights that will help you make informed decisions and overcome any obstacles that come your way.
Durability
When considering the durability of a painted kitchen sink, there are several factors to keep in mind:
- Surface preparation: Properly preparing the sink surface is crucial for achieving good adhesion and a long-lasting finish. This includes cleaning the sink thoroughly, sanding to create a rough surface for the paint to bond to, and removing any loose or flaking paint.
- Priming: A high-quality bonding primer is essential to ensure that the paint adheres well to the surface and provides a durable coating. The primer creates a strong bond between the sink and the paint, increasing its durability.
- Type of paint: Choosing the right type of paint is crucial for achieving a durable finish on a kitchen sink. Epoxy paint and water-resistant enamel paint are commonly used for painting sinks due to their durability and ability to withstand moisture and regular use.
- Number of coats: Applying multiple thin coats of paint is preferable to a single thick coat. This helps to achieve an even finish and enhances the durability of the paint. Applying at least two coats of paint is recommended, allowing each coat to dry before applying the next.
- Sealant: A waterproof sealer over the painted surface can further enhance the sink’s durability. The sealer protects against moisture, stains, and daily wear and tear.
- Maintenance: Proper maintenance is key to preserving the durability of a painted kitchen sink. Avoid using abrasive cleaners or scrub brushes that can damage the paint. Instead, clean the sink using mild dish soap and a soft cloth or sponge.
Fact: A properly painted and maintained kitchen sink can provide long-lasting durability, giving your kitchen a fresh look and saving you the cost of purchasing a new sink.
Maintenance
When painting a kitchen sink, maintenance is an important aspect to consider. It is crucial to take proper care of the painted sink to ensure its longevity and fresh appearance. Here are some tips for maintaining a painted sink:
- Regular cleaning: It is essential to clean the painted sink regularly to remove dirt, grime, and stains. Use a gentle dish soap and a soft scrub pad to clean the surface gently. Avoid using abrasive cleaners or rough sponges that could damage the paint.
- Avoid harsh chemicals: When cleaning the sink, it is advisable to avoid using harsh chemicals as they can strip away the paint. Stick to gentle, non-abrasive cleaning products to preserve the paint finish.
- Prevent scratches: To prevent scratches, be careful when handling utensils, pots, and pans in the painted sink. Placing a sink mat or protective pads at the bottom of the sink can reduce the risk of scratches from heavy items.
- Fix minor damages: If any chipping or peeling of the paint is noticed, it is important to address it immediately. Using touch-up paint can help fix minor damages and prevent them from spreading.
- Avoid extreme temperatures: To maintain the durability of the paint, avoid pouring extremely hot water or placing boiling pots directly into the sink. Protect the painted surface from extreme temperature changes.
- Keep surfaces dry: Dry the sink and surrounding countertop to prevent water stains or moisture buildup after use. This helps maintain the quality of the paint and prevents potential damage.
- Regular inspections: Periodically inspect the painted sink for any signs of wear or damage. This allows prompt addressing of any issues and prevents further damage.
- Maintain a proper seal: Regularly check the sealant if the sink is sealed after painting. If any areas have lost their seal, reapply a waterproof sealer to protect the paint and keep it looking its best.
- Follow manufacturer instructions: Always refer to the manufacturer’s instructions for the specific type of paint used on the sink. This includes following any recommended maintenance and care guidelines.
By following these maintenance tips, you can ensure that your painted kitchen sink remains in optimal condition. With proper care, the paint can last a long time and provide a fresh look to your kitchen.
Limited Color Options
When painting a kitchen sink, one of the limitations you may encounter is the availability of limited colour options. While giving your sink a fresh new look is exciting, it’s important to consider the available colour choices to ensure the result meets your expectations.
- White: White is a classic and popular color choice for kitchen sinks. It provides a clean, timeless look that matches any kitchen decor. This color is prevalent for porcelain kitchen sinks.
- Stainless Steel: Stainless steel sinks often come in silver or metallic colour. This sleek and modern colour gives your kitchen a professional and sophisticated vibe.
- Black or Dark Gray: If you want to make a bold statement, black or dark gray is a great choice. These colors add a touch of elegance and can create a striking contrast in lighter-colored kitchens.
- Metallic Finishes: Some specialty sink paints, such as bronze or copper, offer metallic finishes. These colors can add a unique and luxurious touch to your kitchen sink.
- Custom Colors: While limited color options may be available in standard sink paints, some professional refinishing services can create custom colors for your sink. This allows you to match your sink to any color scheme or personal preference.
Remember, when considering limited color options for painting your kitchen sink, it’s important to explore different paint options and, if necessary, seek professional assistance to achieve the desired color and look. Don’t be afraid to think outside the box and opt for custom colors if standard options don’t meet your needs.
Some Facts About Can You Paint a Kitchen Sink:
- ✅ Porcelain, metal, and other types of kitchen sinks can be painted to refresh their appearance. (Source: House Keeping Bay)
- ✅ Proper surface preparation, including cleaning and sanding, is essential before painting a kitchen sink. (Source: Kitchen Profy)
- ✅ It is important to use the right type of paint and allow it to fully dry before using the sink. (Source: Kitchen Profy)
- ✅ Water-based latex paint is recommended for painting a kitchen sink. (Source: Kitchen Profy)
- ✅ Painting a kitchen sink can give it a fresh new look without the need for replacement. (Source: Hunker)