Electro Culture Gardening is an innovative and sustainable gardening technique that utilizes low-level electrical currents to enhance plant growth, improve soil health, and increase crop yield. While relatively lesser known than traditional gardening methods, Electro Culture Gardening has gained attention for its promising benefits.
To understand the concept better, electroculture is “the direct or indirect application of electricity to vegetative life, for stimulating, influencing or otherwise altering the growth or form of plants, or for providing vital essences or electromagnetic forces for plants.” (Reference: Published scientific paper by Geza Csapo in the Journal of Electro-Culture, 1943)
Key takeaway:
- Electro Culture Gardening maximizes plant health: Using electro culture techniques, this gardening method optimizes plant growth and vitality, resulting in healthier and more productive plants.
- Electro Culture Gardening is adaptable to various gardening spaces: Whether you have a small balcony or a large backyard, electro culture techniques can be applied to different gardening spaces, allowing anyone to enjoy the benefits of this method.
- Regular monitoring and adjustments are essential in Electro Culture Gardening: To ensure the success of your electro culture setup, it is important to regularly monitor plant health, adjust electro culture parameters, and troubleshoot common issues that may arise.
This beginner’s guide provides step-by-step instructions and tips for those interested in this unique gardening approach. Starting with an overview of Electro Culture Gardening and how it works, we will explore why you should consider this technique. Then, we will provide detailed instructions on getting started, including understanding the basics, assessing your gardening space, and gathering the necessary tools and materials.
Once you have all the essentials, we will guide you through implementing electro-culture techniques, from preparing the soil to applying the methods and monitoring their effectiveness. We will offer valuable tips to ensure success in Electro electro-culture gardening, such as selecting suitable plants, maintaining optimal moisture levels, and adjusting electro-culture parameters.
We will also highlight common mistakes to avoid and troubleshoot common issues that may arise during the process. With this comprehensive beginner’s guide, you will have the knowledge and confidence to embark on your Electro Culture Gardening journey.
What is Electro Culture Gardening?
Electro-culture gardening is a technique that involves using electricity to enhance plant growth and improve overall crop yield. This innovative approach harnesses the power of electrical currents to stimulate plant roots, enhance nutrient absorption, and boost overall plant health.
Low-level direct electrical currents are applied to the soil or plant roots in Electro Culture Gardening. These currents are gentle and safe and act as a stimulant for the plants. The electrical currents activate various physiological processes in the plants, including increased nutrient uptake, improved water absorption, and enhanced metabolism.
One of the main benefits of Electro Culture Gardening is its positive impact on plant growth. Studies have shown that plants grown using this technique have larger root systems, increased biomass, and faster growth rates than conventionally grown plants. Electro Culture Gardening can also improve the plant’s resistance to diseases and pests, resulting in healthier and more robust crops.
Furthermore, this technique can help reduce the need for synthetic fertilizers and pesticides. Electro Culture Gardening helps plants utilize available resources more efficiently by enhancing nutrient uptake and plant metabolism. This can significantly reduce the use of chemicals, making it an eco-friendly gardening method.
It is important to note that while Electro Culture Gardening shows promising results, it is still a relatively new field of study, and further research is needed to fully understand its potential and optimize its application in different crop types and environmental conditions.
Using electricity in agriculture can be traced back to the early 20th century. Russian biologist Alexander Gurwitsch first discovered the presence of electric currents in plants in the 1920s. His research laid the foundation for further exploration in the field of electroculture.
Since then, scientists and researchers worldwide have been studying the effects of electrical currents on plant growth. This ongoing research has led to the development of Electro Culture Gardening as a viable technique for improving crop production and sustainability.
How Does Electro Culture Gardening Work?
Electro Culture Gardening is a technique that utilizes low levels of electricity to enhance plant growth and improve overall plant health naturally. So, how does Electro Culture Gardening work? It begins by attaching electrodes to the soil or the plant’s root system. These electrodes deliver a small electrical current that mimics the natural flow of ions in the soil. By stimulating the plant’s cells, this current promotes the growth of beneficial microorganisms, accelerates nutrient uptake, and improves water absorption.
By enhancing nutrient uptake, Electro Culture Gardening allows plants to access more essential minerals and trace elements. This ultimately leads to healthier, more vibrant plants with increased yields. Moreover, the electrical current aids in breaking down soil particles, improving soil structure and aeration.
Not only that, but Electro Culture Gardening also promotes healthier microbial activity in the soil. The electrical current stimulates the growth of beneficial soil bacteria and fungi, aiding nutrient cycling and improving overall soil fertility.
It is important to note that Electro Culture Gardening should always be used with proper soil preparation and plant care techniques. This includes providing adequate water and nutrients, monitoring soil moisture levels, and ensuring proper plant spacing. So, following these guidelines is essential to maximize the benefits of Electro Culture Gardening.
Why Choose Electro Culture Gardening?
When considering different gardening methods, electro-culture gardening offers a unique and beneficial approach. Why choose electro-culture gardening? Let’s explore the reasons.
- Enhanced plant growth: Electroculture gardening has been shown to boost plant growth by enhancing the uptake of nutrients and water through the plant’s roots. Studies have demonstrated an average increase in plant growth of 20% to 30% compared to traditional gardening methods.
- Improved nutrient absorption: Electroculture gardening allows plants to absorb nutrients more efficiently, leading to healthier and more vigorous growth. This can significantly enhance the nutritional value of the plants you cultivate.
- Decreased pesticide use: Electroculture gardening can reduce the need for synthetic pesticides. By enhancing the natural defense mechanisms of plants, they become more resistant to pests and diseases.
- Water conservation: Electro-culture gardening promotes water conservation by reducing water evaporation from the soil. This can be especially beneficial in areas with limited water resources or during dry seasons.
- Environmental friendliness: Compared to traditional gardening methods, electro-culture gardening is more environmentally friendly. With the reduced need for synthetic fertilizers and pesticides, there is a decrease in chemical runoff that can harm local ecosystems.
It’s important to note that while electro-culture gardening offers numerous advantages, following proper guidelines and safety precautions is essential. Consulting with experts in the field or reading comprehensive guides like the “Beginner’s Guide to Electro Culture Gardening” can provide valuable insights for successful implementation.
Considering the benefits outlined above, electro-culture gardening is a promising choice for those looking to cultivate healthy and thriving plants while being mindful of the environment. By embracing this innovative gardening method, you can enhance your gardening experience and contribute to sustainable practices.
Getting Started with Electro Culture Gardening
Get ready to embark on a thrilling journey into electro-culture gardening!
In this section, we’ll dive headfirst into the steps you need to take to get started with this innovative gardening method. From understanding the basics of electro-culture to assessing your gardening space and gathering the necessary tools and materials, we’ve got you covered.
So tighten your gardening gloves, and let’s begin our adventure into the electrifying realm of electro-culture gardening.
Step 1: Understanding the Basics of Electro Culture
Understanding the basics of electro culture is the first step towards successfully implementing this gardening technique. Here are the key steps to grasp the fundamentals of electro-culture gardening:
- Familiarize yourself with electro-culture principles, which involve using weak electrical currents to enhance plant growth and health. Understand how these currents affect the plants and what benefits they offer.
- Step 2: Study Plant Physiology: Gain knowledge about the physiological processes of plants and how they interact with electrical stimulation. Learn about the role of ions, nutrients, and water absorption in plant growth to understand how electroculture can positively impact these processes.
- Step 3: Research Electrode Placement: Explore different methods and practices of electrode placement in electro-culture gardening. Understand the significance of proper electrode positioning to ensure optimal electrical stimulation for the plants.
- Step 4: Learn About Electrical Parameters: Study the electrical parameters involved in electroculture, such as voltage, frequency, and duration of electrical stimulation. Understand how different parameters can influence plant growth and adjust them accordingly.
- Step 5: Consider Plant Selection: Not all plants are suitable for electro-culture gardening. Some plants may be more responsive to electrical stimulation than others. Choose plants that benefit from this technique and align with your gardening goals.
- Step 6: Understand Safety Precautions: Understand and follow safety protocols before implementing electro culture. Familiarize yourself with electrical safety measures to prevent accidents or harm during gardening.
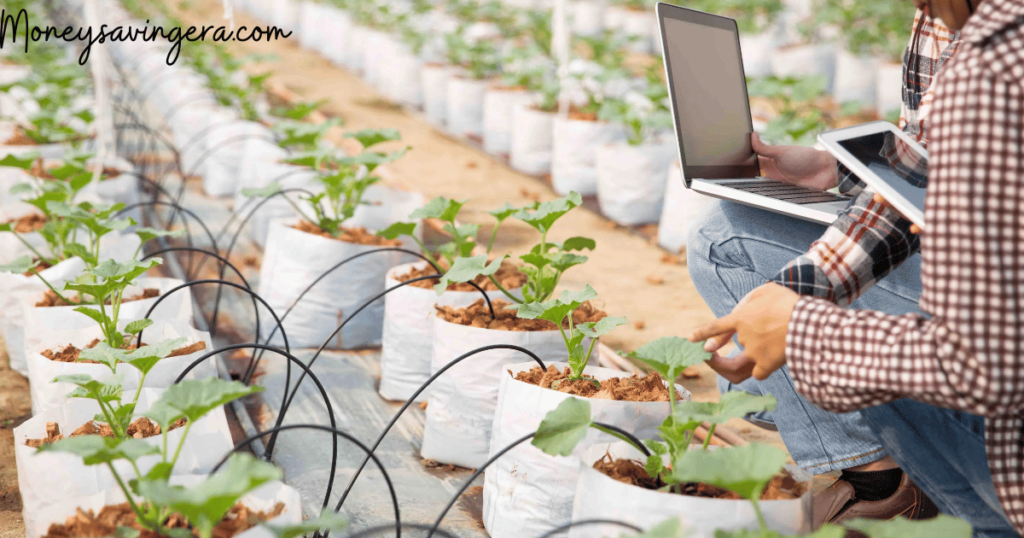
- Step 7: Stay Updated: Electro-culture gardening is a field that continues to evolve with new research and advancements. Stay updated on the latest studies, techniques, and innovations to continually enhance your knowledge and improve your electro-culture practice.
By understanding these fundamental steps of electro-culture gardening, you can lay a solid foundation for implementing this technique effectively and reaping its benefits in your garden.
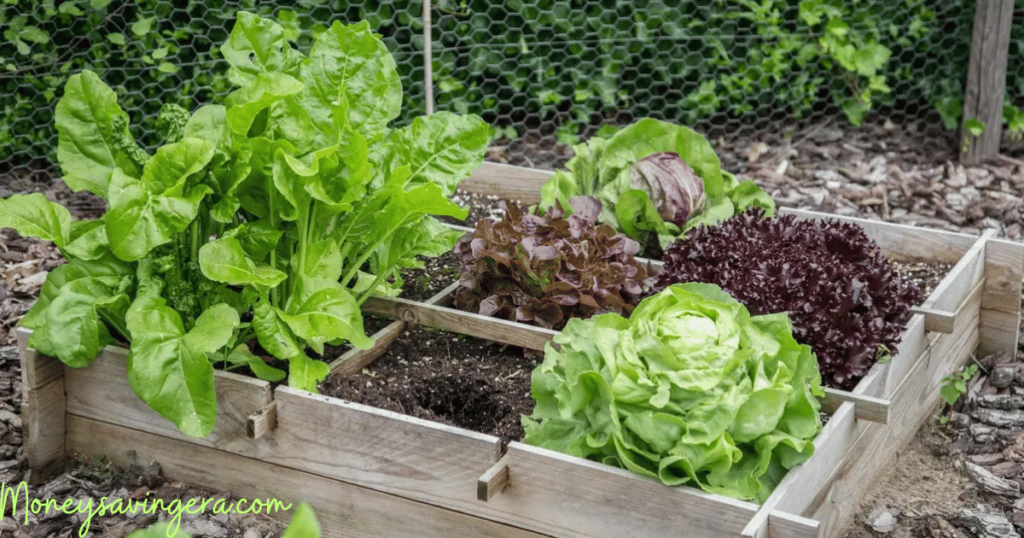
Step 2: Assessing Your Gardening Space
In electro-culture gardening, assessing your gardening space is important to ensure optimal results. Here are the steps to follow:
- Measure your gardening space: Use a tape measure or any other measuring tool to determine the dimensions of your gardening area. Note the length, width, and any irregular shapes or obstacles.
- Assess sunlight exposure: Observe the direction your gardening space faces and how much sunlight it receives throughout the day. This will help you determine the best plants to grow in each area within your space.
- Evaluate soil quality: Take soil samples from different areas of your gardening space. Analyze the pH levels, nutrient content, and texture of the soil. This will help you understand if any amendments are necessary for optimal plant growth.
- Check for drainage capabilities: Determine if your gardening space has proper drainage to prevent waterlogging. Dig small holes in different areas and observe how quickly the water drains. Adjustments might be needed to improve drainage if necessary.
- Consider microclimates: Identify microclimates within your gardening space. These are areas that have slightly different environmental conditions, such as temperature or moisture levels, compared to the surrounding areas. Take note of these microclimates and plan accordingly when choosing plants.
- Assess accessibility: Evaluate how easily accessible your gardening space is in terms of water source, tools, and maintenance. Consider factors such as proximity to water outlets and the availability of pathways for easy movement within the garden.
- Identify potential challenges: Take note of any challenges or limitations within your gardening space. This could include issues like limited space for certain plant varieties or the presence of nearby structures that may obstruct sunlight.
- Document your assessment: Record your gardening space assessment, including all the measurements, observations, and challenges you have identified. This documentation will be valuable when planning and implementing your electro-culture gardening techniques.
By thoroughly assessing your gardening space, you can make informed decisions and create the ideal environment for your electro-culture garden to thrive.
Step 3: Gathering the Necessary Tools and Materials
The following steps are required to gather the necessary tools and materials for electro-cultural gardening.
- Research: Conduct thorough research on electro-culture gardening is essential before gathering the tools and materials. Understand the principles and techniques involved in this gardening method to make informed choices.
- Containers: Select suitable containers for your plants. Choose pots or containers that allow the plant’s root system to grow. Ensure the containers have good drainage to prevent waterlogging.
- Electrodes: Acquire the necessary electrodes for the electroculture setup. These electrodes will be utilized to deliver gentle electrical currents to the plants. Consider purchasing high-quality electrodes that are specifically designed for gardening purposes.
- Electrolyte Solution: Electrolyte solutions are essential for conducting electricity through the soil. Prepare or purchase an appropriate electrolyte solution that contains the necessary minerals to support plant growth.
- Watering Can: A watering can with a narrow spout is recommended to ensure accurate and controlled watering. Choose a can that is easy to handle and has a comfortable grip.
- Measuring Equipment: Invest in a pH meter and a moisture meter to accurately measure the soil’s pH level and moisture content. These tools will help you monitor and adjust the electro-culture parameters effectively.
- Plant Nutrients: Depending on the needs of your plants, gather the necessary plant nutrients. Choose organic or inorganic fertilizers that are suitable for electro-culture gardening. Follow the recommended application rates for optimal plant growth.
- Protective Gear: As a precautionary measure, wear gloves and safety goggles while working with the electrolyte solution and electrodes to ensure safety and prevent any potential accidents.
- Planting Medium: Select a suitable planting medium for your plants. It can be a combination of soil, compost, and other organic materials. Ensure the planting medium is well-draining and provides the necessary nutrients for plant growth.
Remember, each step is crucial in gathering the necessary tools and materials for electro culture gardening. Following these steps will prepare you to embark on your electro-culture gardening journey.
Implementing Electro Culture Techniques
Get your hands dirty and amplify your gardening skills with electro culture techniques. This section will dive into the nitty-gritty of implementing these innovative methods.
From preparing the soil to applying the electro-culture techniques and monitoring and adjusting the setup, we’ve got you covered. Get ready to witness the power of electricity as we transform your gardening experience into a cutting-edge adventure.
Step 4: Preparing the Soil
Preparing the Soil
- Clear the area: Start by clearing the gardening area of any weeds, debris, or rocks. Remove any existing plants or grass that may interfere with the soil preparation process.
- Test the soil pH: Use a soil testing kit to determine the soil’s pH level. This will help you understand the acidity or alkalinity of the soil, which can impact plant growth. Aim for a pH level that is suitable for the specific plants you will be growing.
- Amend the soil: Based on the soil test results, you may need to amend the soil to create an optimal plant growing environment. For example, if the soil is too acidic, you can add lime to neutralize it. If it is too alkaline, you can add sulfur to acidify it.
- Improve soil structure: If the soil is compacted or lacks nutrients, you can improve its structure by adding organic matter such as compost or aged manure. This will enhance the plants’ moisture retention, drainage, and nutrient availability.
- Loosen the soil: Use a garden fork or tiller to loosen the soil, breaking up any clumps and aerating it. This will create a favorable environment for the roots to penetrate the soil and access nutrients.
- Remove large rocks and debris: While loosening the soil, remove any large rocks, sticks, or other debris that may hinder plant growth or interfere with planting.
- Level the soil: Ensure the soil surface is even and level, without any major dips or mounds. This will help with proper water distribution and prevent pooling.
- Add necessary nutrients: Based on the nutritional requirements of the plants you are growing, add appropriate organic or synthetic fertilizers to provide essential nutrients. Follow package instructions for application rates.
- Consider soil moisture: Before moving on to the next step, ensure that the soil is moist but not soggy. Proper soil moisture is crucial for plant growth and development.
Step 5: Applying Electro Culture Methods
Applying Electro Culture Methods
- Prepare the electro culture solution by combining the necessary nutrients and minerals. The solution should have a balanced composition tailored to meet the specific requirements of your plants.
- Utilize a watering can or sprayer to administer the electro culture solution to your plants. Be sure to thoroughly cover the leaves, stems, and surrounding soil.
- Consistently apply the electro culture solution according to the instructions provided for the particular plants you are cultivating. Depending on the plant’s growth stage and specific needs, this may involve daily, weekly, or monthly applications.
- Meticulously monitor your plants for any signs of improvement or distress. Observe changes in growth rate, leaf color, and overall health.
- Make adjustments to the electro culture parameters if necessary. This could include modifying the solution’s concentration, application frequency, or exposure duration.
- Continue implementing the electro culture methods throughout the entire growing season of your plants, making any necessary modifications as required.
By following these steps, you will effectively apply electro culture methods to your gardening practices. Remember to maintain consistency, regularly monitor plant health, and make any necessary adjustments to maximize the benefits of electro culture.
Step 6: Monitoring and Adjusting the Electro Culture Setup
Step 6: Monitoring and Adjusting the Electro Culture Setup
- Regularly check the electrical conductivity (EC) levels of the soil using a handheld EC meter. This will help determine if the soil’s electrical charge is optimal for plant growth. Ideally, the EC level should be between 1.5 to 2.5 millisiemens (mS) per centimeter.
- Monitor the pH levels of the soil using a pH meter or testing kit. Electro-culture gardening requires maintaining a slightly acidic pH level in the soil, typically around 6.0 to 6.5. Adjust the pH as needed by adding organic acids or alkaline substances such as lime or sulfur.
- Observe the growth and overall health of the plants. Look for signs of stress or nutrient deficiencies, such as yellowing leaves or stunted growth. Adjust the nutrient solution accordingly by adding specific fertilizers or adjusting the concentration of the existing nutrient solution.
- Measure the water level and moisture content of the soil regularly. The soil should be consistently moist but not overly saturated. Use a soil moisture meter or check the soil using your fingers. Adjust watering frequency and duration accordingly to maintain optimal moisture levels.
- Keep an eye on the temperature and humidity levels in the growing environment. Electroculture gardening thrives in controlled environments with temperatures between 70 to 80 degrees Fahrenheit (21 to 27 degrees Celsius) and humidity levels around 50 to 70%. Use thermometers and hygrometers to monitor and adjust the conditions as needed.
- Maintain proper air circulation and ventilation in the growing area. Adequate airflow helps prevent the buildup of excess heat, humidity, and stagnant air, which can lead to fungal diseases. Use fans or natural ventilation to ensure a constant flow of fresh air around the plants.
By diligently monitoring and adjusting the electro-culture setup, you can optimize the conditions for plant growth and maximize the benefits of electro-culture gardening.
Remember, the success of your electro culture garden relies on consistent care and attention to detail. Here are a few additional suggestions to enhance your electro culture gardening experience:
- Keep a garden journal to track your observations, adjustments, and results. This will help you learn from your experiences and improve your gardening techniques.
- Engage in ongoing learning about electro culture gardening. Stay updated with the latest research and techniques to stay at the forefront of this innovative gardening method.
- Connect with fellow electro culture gardeners through online forums or local gardening communities. Share knowledge, tips, and experiences to learn from others and build a supportive network.
- Experiment with different plant varieties and combinations in your electro culture garden. Explore the possibilities and discover which plants thrive best in this unique growing environment.
- Embrace the process and enjoy the rewards of electro culture gardening. Witness your plants’ incredible growth and productivity as you cultivate an electrifying garden.
Tips for Success in Electro Culture Gardening
Discover the insider tips that will lead you to success in the fascinating world of electro culture gardening. From choosing the perfect plants to maintaining optimal moisture levels, adjusting electro culture parameters, monitoring plant health regularly, to safeguarding your plants from external factors – this section is packed with practical advice. Get ready to take your gardening skills to the next level and unlock the full potential of electro culture gardening.
Tip 1: Choosing the Right Plants for Electro Culture
Choosing the right plants for successful electro culture gardening is crucial. Here are some tips to help you select the best plants for this gardening technique:
- Consider plant adaptability: Look for plants that adapt well to different environmental conditions. These plants will have a higher chance of thriving in an electro culture setup.
- Focus on nutrient requirements: Choose plants with moderate to high nutrient requirements. Electro culture gardening provides an enhanced nutrient delivery system, so plants that need more nutrients will benefit the most.
- Look for plants with strong root systems: Strong and healthy root systems are essential for optimal nutrient absorption in electro culture gardening. Select plants that are known to develop robust root systems.
- Consider growth habits: Plants with vigorous growth habits respond well to electro culture techniques. Look for plants that have a reputation for quick and abundant growth.
- Choose plants with high water requirements: Electro culture gardening enhances water delivery to plant roots. Therefore, selecting plants with high water needs will ensure maximum utilization of the electro culture system.
Following these tips, you can choose plants most likely to thrive in an electro culture gardening setup. When selecting, consider adaptability, nutrient requirements, root health, growth habits, and water needs.
Tip 2: Maintaining the Correct Moisture Levels
When practicing electro culture gardening, maintaining the correct moisture levels is crucial for the success of your plants. Here are some steps to help you maintain the ideal moisture levels:
- Assess the specific moisture requirements of your plants. Different plants have different needs when it comes to moisture levels. Research the optimal moisture range for the plants you are growing.
- Use a moisture meter or probe to monitor the moisture levels in the soil regularly. This will give you an accurate measurement of how much water your plants are receiving.
- Water your plants at the appropriate times. Avoid overwatering, as it can lead to root rot and other issues. Water the plants when the top inch of soil feels dry.
- Provide adequate drainage for your plants. Ensure your pots or garden beds have drainage holes to prevent water pooling at the roots.
- Adjust the watering frequency based on the weather conditions. During hot, dry periods, you may need to water more frequently to prevent the soil from drying out. Conversely, during cooler, rainy periods, you may need to reduce watering to prevent waterlogged soil.
- Mulch the soil surface to help retain moisture. Mulch acts as a barrier, preventing water from evaporating too quickly from the soil. This can help maintain consistent moisture levels.
Following these tips ensures that your plants receive the correct moisture levels for optimal growth and health in your electro-culture garden.
Tip 3: Adjusting Electro Culture Parameters
Adjusting electro-culture parameters is a crucial aspect of successful electro-culture gardening. To ensure optimal growth and development of your plants, follow these steps:
- Identify the current parameters: Before making any adjustments, determine the current electroculture parameters of your garden, including voltage, frequency, and duration of electrical impulses.
- Research optimal ranges: Study the specific plant or crop you are growing and find the ideal electro-culture parameters for its growth. Different plants may require different ranges of electrical impulses.
- Adjust voltage: Based on your research, modify the voltage of the electrical impulses delivered to the plants. Use a voltage regulator or adjust the settings on your electro-culture system.
- Modify frequency: Experiment with different frequencies of electrical impulses to find the one that best suits your plants. Increasing or decreasing the frequency can affect plant growth and health differently.
- Monitor plant response: Observe how your plants respond to the adjusted electroculture parameters. Look for improved growth, increased yield, or enhanced resistance to pests and diseases. Keep track of any changes or improvements you notice.
- Fine-tune the parameters: If necessary, based on your observations and plant response, make further adjustments to the electro culture parameters. Finding the optimal settings for your specific plants may take some trial and error.
- Maintain consistency: Once you have determined your plants’ ideal electro culture parameters, strive to maintain consistency in delivering the electrical impulses. Regularly monitor the voltage and frequency to ensure they remain within the desired ranges.
Pro-tip: Keeping a record of your electro-culture adjustments and the corresponding plant responses is recommended. This will help you track the effectiveness of different parameter settings and refine your approach over time.
Tip 4: Regularly Monitoring Plant Health
Regularly monitoring plant health is an important aspect of electro-culture gardening. By closely monitoring your plants, you can quickly identify any issues and take appropriate action to ensure their well-being. Here are the steps for tip 4: regularly monitoring plant health.
- Perform visual inspections: Regularly observe your plants for any visible signs of distress or disease. Look for wilting, discolouration, deformities, or pests.
- Check for pests: Inspect your plants for signs of pests such as aphids, mites, or caterpillars. Look under leaves, in the soil, and on stems for any indications of infestation.
- Monitor growth and development: Observe the growth and development of your plants. Keep track of their size, leaf production, and overall vitality. Any changes in growth patterns may indicate underlying issues.
- Ensure proper watering: Monitor the moisture levels in the soil and adjust your watering schedule accordingly. Overwatering or underwatering can lead to various plant health problems.
- Watch for nutrient deficiencies: Pay attention to any signs of nutrient deficiencies in your plants. Look for yellowing leaves, stunted growth, or poor fruit production. Adjust your fertilization routine if needed.
- Keep track of environmental conditions: Note any significant changes in temperature, humidity, or sunlight exposure. Extreme conditions can impact plant health and may require adjustments or protective measures.
- Document observations: Maintain a garden journal or record your observations electronically. This will help you track plant health and identify patterns or recurring issues.
- Take action promptly: Take immediate action if you notice any signs of plant distress or disease. This may involve pruning affected areas, applying organic pest control methods, or seeking professional advice.
- Seek expert guidance: If you’re unsure about specific plant symptoms or how to address them, consult with a local horticulturist, gardening expert, or extension service for guidance.
- Continuously educate yourself: Stay updated on the latest research and best practices for maintaining plant health. Attend gardening workshops, read books, or join online gardening communities to expand your knowledge.
Regularly monitoring your plants’ health can catch and address issues early, ensuring their optimal growth and productivity in your electro-culture garden.
Tip 5: Protecting Plants from External Factors
Protecting plants from external factors is crucial for their growth and overall health. Here are some steps you can take to ensure your plants are well-protected:
- Choose the right location: Consider the area’s environmental conditions when planting your garden. Ensure that your plants are placed in an area that receives adequate sunlight, is sheltered from strong winds, and has good drainage.
- Provide proper support: Some plants, such as tall or vining varieties, may require support to prevent them from falling over or breaking. Use stakes, trellises, or cages to provide the necessary support.
- Protect against pests: Pests can cause significant damage to plants. To keep pests at bay, use organic pest control methods, such as neem oil or companion planting with pest-repellent plants.
- Protect from extreme weather: Plants are vulnerable to extreme weather conditions. Use covers or cloths to protect them from frost during colder months and provide shade during hot summer days.
- Water properly: Tip 5: Protecting Plants from External Factors. Overwatering or underwatering can harm plants. Follow watering guidelines specific to each plant to ensure they receive the right water. Consider using a drip irrigation system to provide consistent moisture.
- Mulch: Applying a layer of mulch around the base of plants can help conserve moisture, regulate soil temperature, and prevent weed growth. Use organic mulch like wood chips or straw.
- Regularly inspect: Monitor your plants for signs of disease, insect infestation, or nutrient deficiencies. Early detection can help prevent further damage and allow for timely treatment.
- Remove fallen leaves and debris: Fallen leaves and other debris can create a breeding ground for pests and diseases. Regularly clean the garden bed to maintain a clean and healthy environment for your plants.
- Protect from animals: Depending on your area, animals like rabbits, deer, or squirrels may be a threat to your plants. Install fences or use animal repellents to protect your plants from being damaged or eaten.
By following these steps, you can ensure that your plants are well-protected from external factors and have the best chance for healthy growth.
Common Mistakes to Avoid in Electro Culture Gardening
When practicing electro culture gardening, it’s crucial to be aware of common mistakes to avoid for a successful result. You can ensure optimal outcomes and a prospering garden by avoiding these errors. Here are some common mistakes to avoid in electro-culture gardening:
- Using the wrong materials: For effective electro culture gardening, using the right materials is paramount. Utilizing low-quality wires or electrodes can result in poor conductivity and inefficiency. Investing in high-quality materials specifically designed for electro culture gardening is crucial to attain optimal results.
- Incorrect electrode placement: Improper placement of electrodes can hinder the proper distribution of electrical charges to the soil. It is essential to adhere to proper electrode placement guidelines and ensure even distribution throughout the garden. This evenly distributed placement will facilitate an equal electrical field across all plants.
- Not maintaining the correct voltage: Electro culture gardening necessitates a specific voltage to stimulate plant growth effectively. Many beginners make the mistake of using either too high or too low voltage, which can adversely affect plant health. Measuring and maintaining the correct voltage levels based on the specific requirements of the plants being grown is crucial.
- Overusing fertilizers: Some gardeners mistakenly assume that electro-culture gardening can substitute traditional fertilizers. However, this is not the case. Electroculture gardening should be used as a supplement to traditional fertilizers rather than a replacement. Excessive use of fertilizers or neglecting their use can result in plant nutrient deficiencies.
- Ignoring plant needs: It is essential to remember that plants have individual needs and preferences. Not all plants will equally benefit from electro-culture gardening. While some plants may respond positively, others may not exhibit noticeable improvements. Understanding the specific requirements of the plants in your garden and adjusting your electro-culture gardening practices accordingly is important.
Troubleshooting Common Issues in Electro-Culture Gardening
When practising electro-culture gardening, it is common to encounter some troubleshooting issues in electro culture gardening along the way. Here are some steps to help you address common problems:
- Yellowing leaves: If you notice yellowing leaves in your plants, it may indicate a nutrient deficiency. Boost plant health by cultivating nutrient-rich soil and enhancing soil fertility using organic fertilizers.
- Poor growth or stunted plants: A lack of adequate sunlight or water can lead to stunted growth. Ensure your plants receive sufficient sunlight and water them regularly, maintaining proper moisture levels in the soil.
- Pests and diseases: If you spot pests or signs of disease on your plants, take immediate action. Remove infected plant parts, introduce beneficial insects, or use organic pest control methods to manage the issue.
- Electrode malfunction: If your electrodes are not working properly, check the connections and ensure they are securely attached. Clean the electrodes regularly to remove any buildup or debris.
- Imbalanced pH levels: Maintaining the right pH is crucial in electro-culture gardening. Test the pH of your soil regularly and make adjustments using natural amendments like lime or sulfur to achieve the optimal pH range for your plants.
- Waterlogging: Excessive water can lead to waterlogging, causing root rot and suffocating plant roots. Improve drainage by adding organic matter to the soil or adjusting the slope of your garden beds.
- Uneven plant growth: If you notice uneven growth in your plants, it may indicate an uneven distribution of electricity. Ensure that all plants in your garden receive equal exposure to electrical current by positioning electrodes properly and adjusting the setup if necessary.
Remember, troubleshooting common issues in electro-culture gardening requires attentiveness and regular monitoring of your garden. By addressing problems promptly and making appropriate adjustments, you can cultivate a successful and thriving electro-culture garden.
Some Facts
- ✅ Electro culture gardening uses atmospheric electricity to enhance plant growth by up to 300%. (Source: Our Team)
- ✅ Copper wire and magnets are employed in electro culture gardening to stimulate the soil naturally. (Source: Our Team)
- ✅ This method eliminates the need for harmful chemical fertilizers and pesticides. (Source: Our Team)
- ✅ Beginners can easily implement electro culture gardening using simple techniques like using copper wire antennas. (Source: Our Team)
- ✅ Electro culture gardening results in increased plant growth, higher yields, and improved soil fertility. (Source: Our Team)
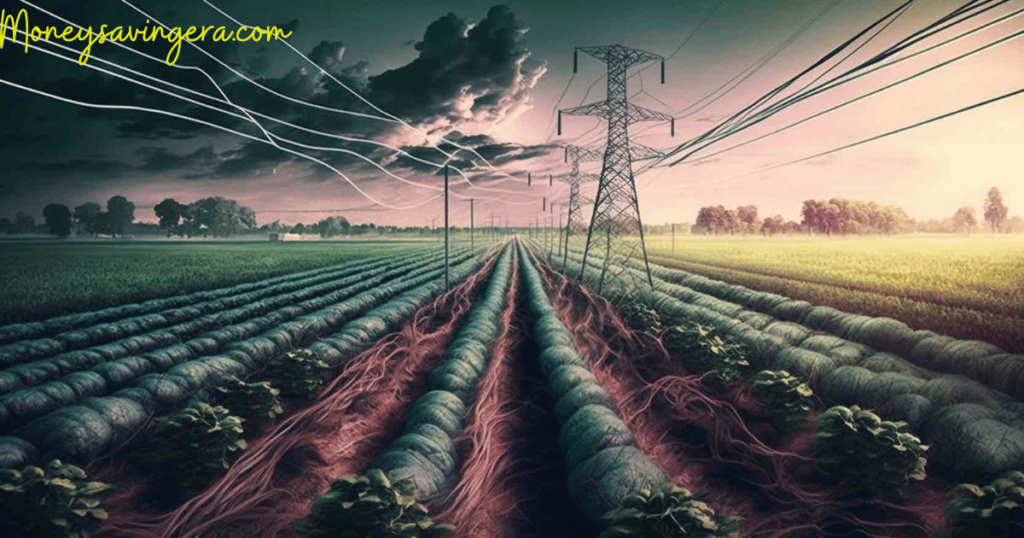
Electroculture is a method of using atmospheric electricity to enhance plant growth. It involves using materials like copper wire and magnets to stimulate the soil and increase yields by 100% – 300%. This technique eliminates the need for chemical fertilizers and pesticides. However, despite its effectiveness, electroculture has not gained widespread popularity due to opposition from the agrochemical industry.
Using chemical fertilizers and weed killers, such as Monsanto’s glyphosate, has been proven harmful to the environment and human health. In contrast, electroculture offers a natural, sustainable solution to enhance crop yields. Experiments with electromagnetic energy to increase crop yield have been conducted since the discovery of electricity in the 1780s.
One of the early pioneers of electroculture, Justin Christofleau, faced persecution from agrochemical lobbyists in the 1920s. They even tried to remove the term “electroculture” from encyclopedias. However, despite the opposition, electroculture was adopted by farmers in various countries, including Australia, Africa, and China.
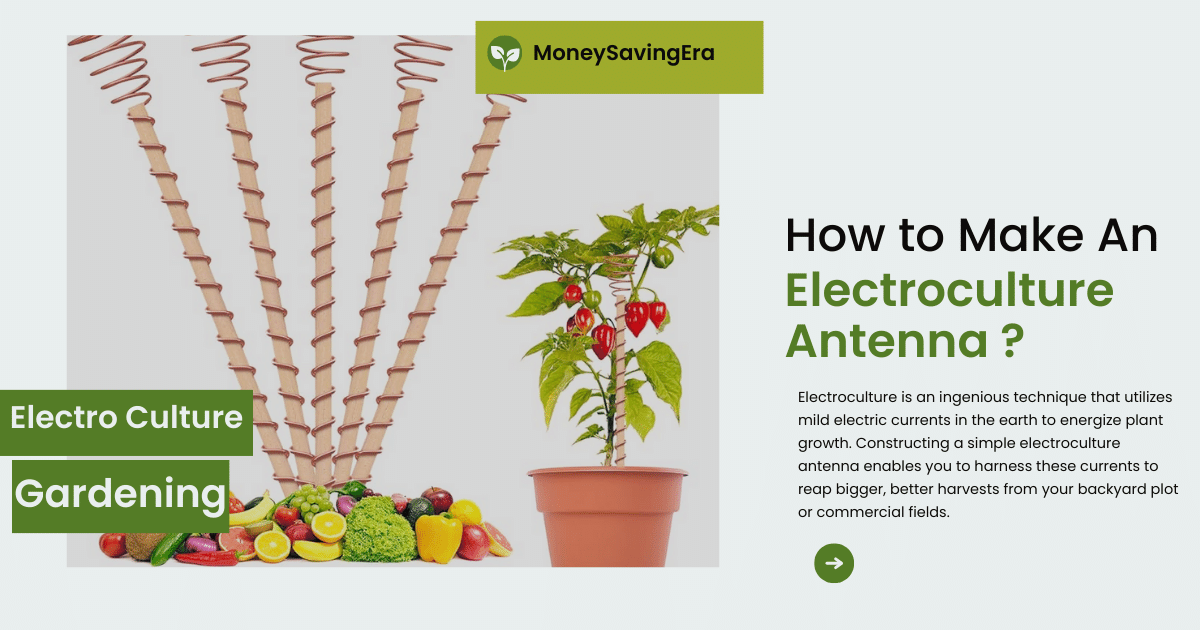
There are different methods of electroculture, such as using copper pyramids or magnets connected to galvanized wire as underground antennas. However, modern electroculture methods have become even simpler. One common method is planting a spiral antenna, a copper wire, into the soil. This wire acts as an antenna to collect atmospheric energy and direct it into the soil.
These methods can be easily implemented using low-cost materials like copper wire at hardware or craft stores. Electroculture offers numerous benefits, many advertised over 70 years ago. These benefits include increased plant growth, higher yields, and improved soil fertility. Justin Christofleau’s book, “Electroculture,” published in 1925, provides detailed information on these benefits.
In summary, electroculture is a simple and effective method of using atmospheric electricity to enhance plant growth. It eliminates the need for chemical fertilizers and pesticides, offering a natural and sustainable solution. Despite facing opposition from the agrochemical industry, electroculture has been adopted by farmers in various countries.
Modern electroculture methods, such as copper wire antennas, are easy to implement and provide numerous benefits for crop production.